Documentation Index
Fetch the complete documentation index at: https://help.maestra.io/llms.txt
Use this file to discover all available pages before exploring further.
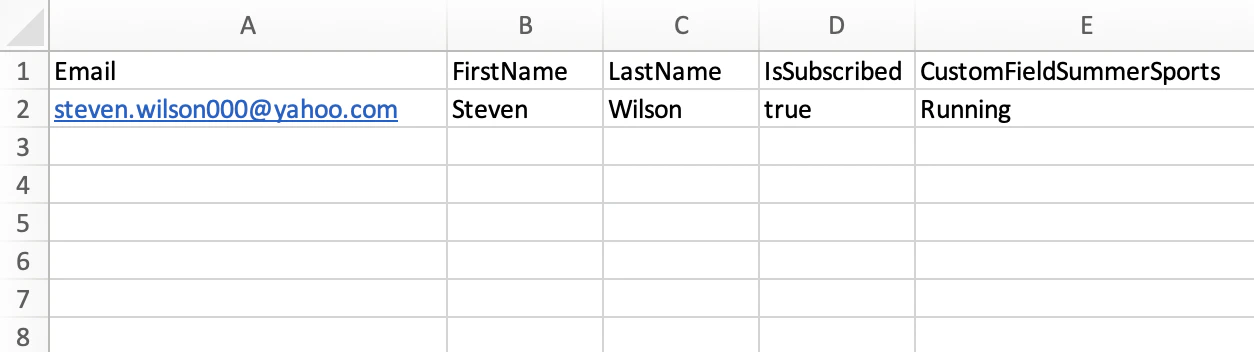
1. Prepare your file for import
Go to Customer Data Platform → Customers → Import .csv → Customer data: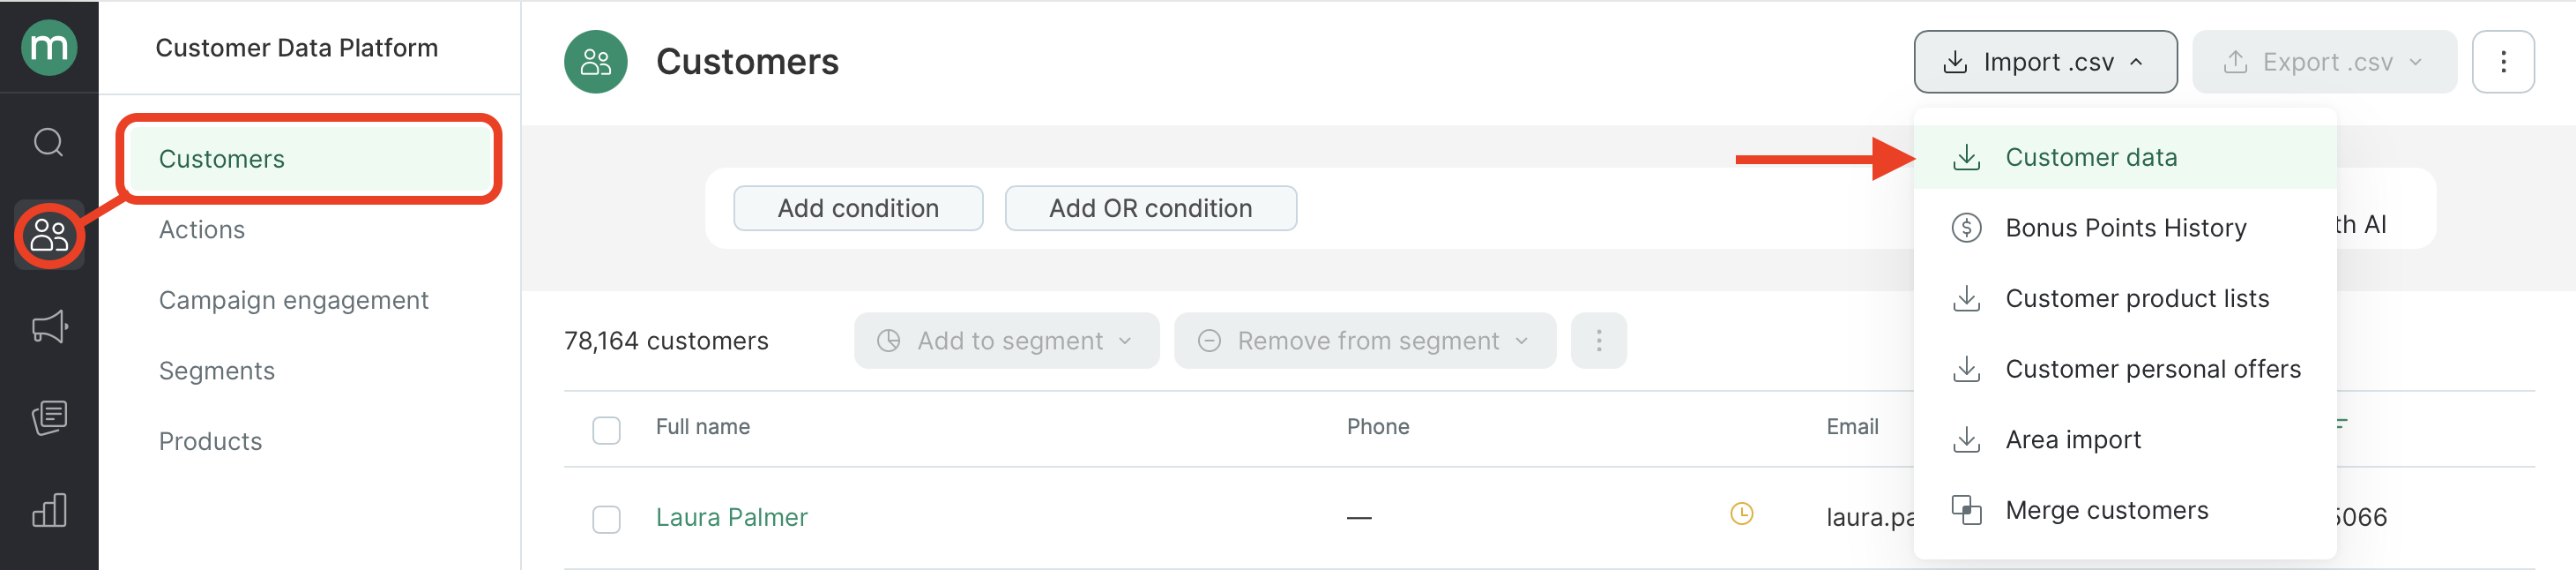
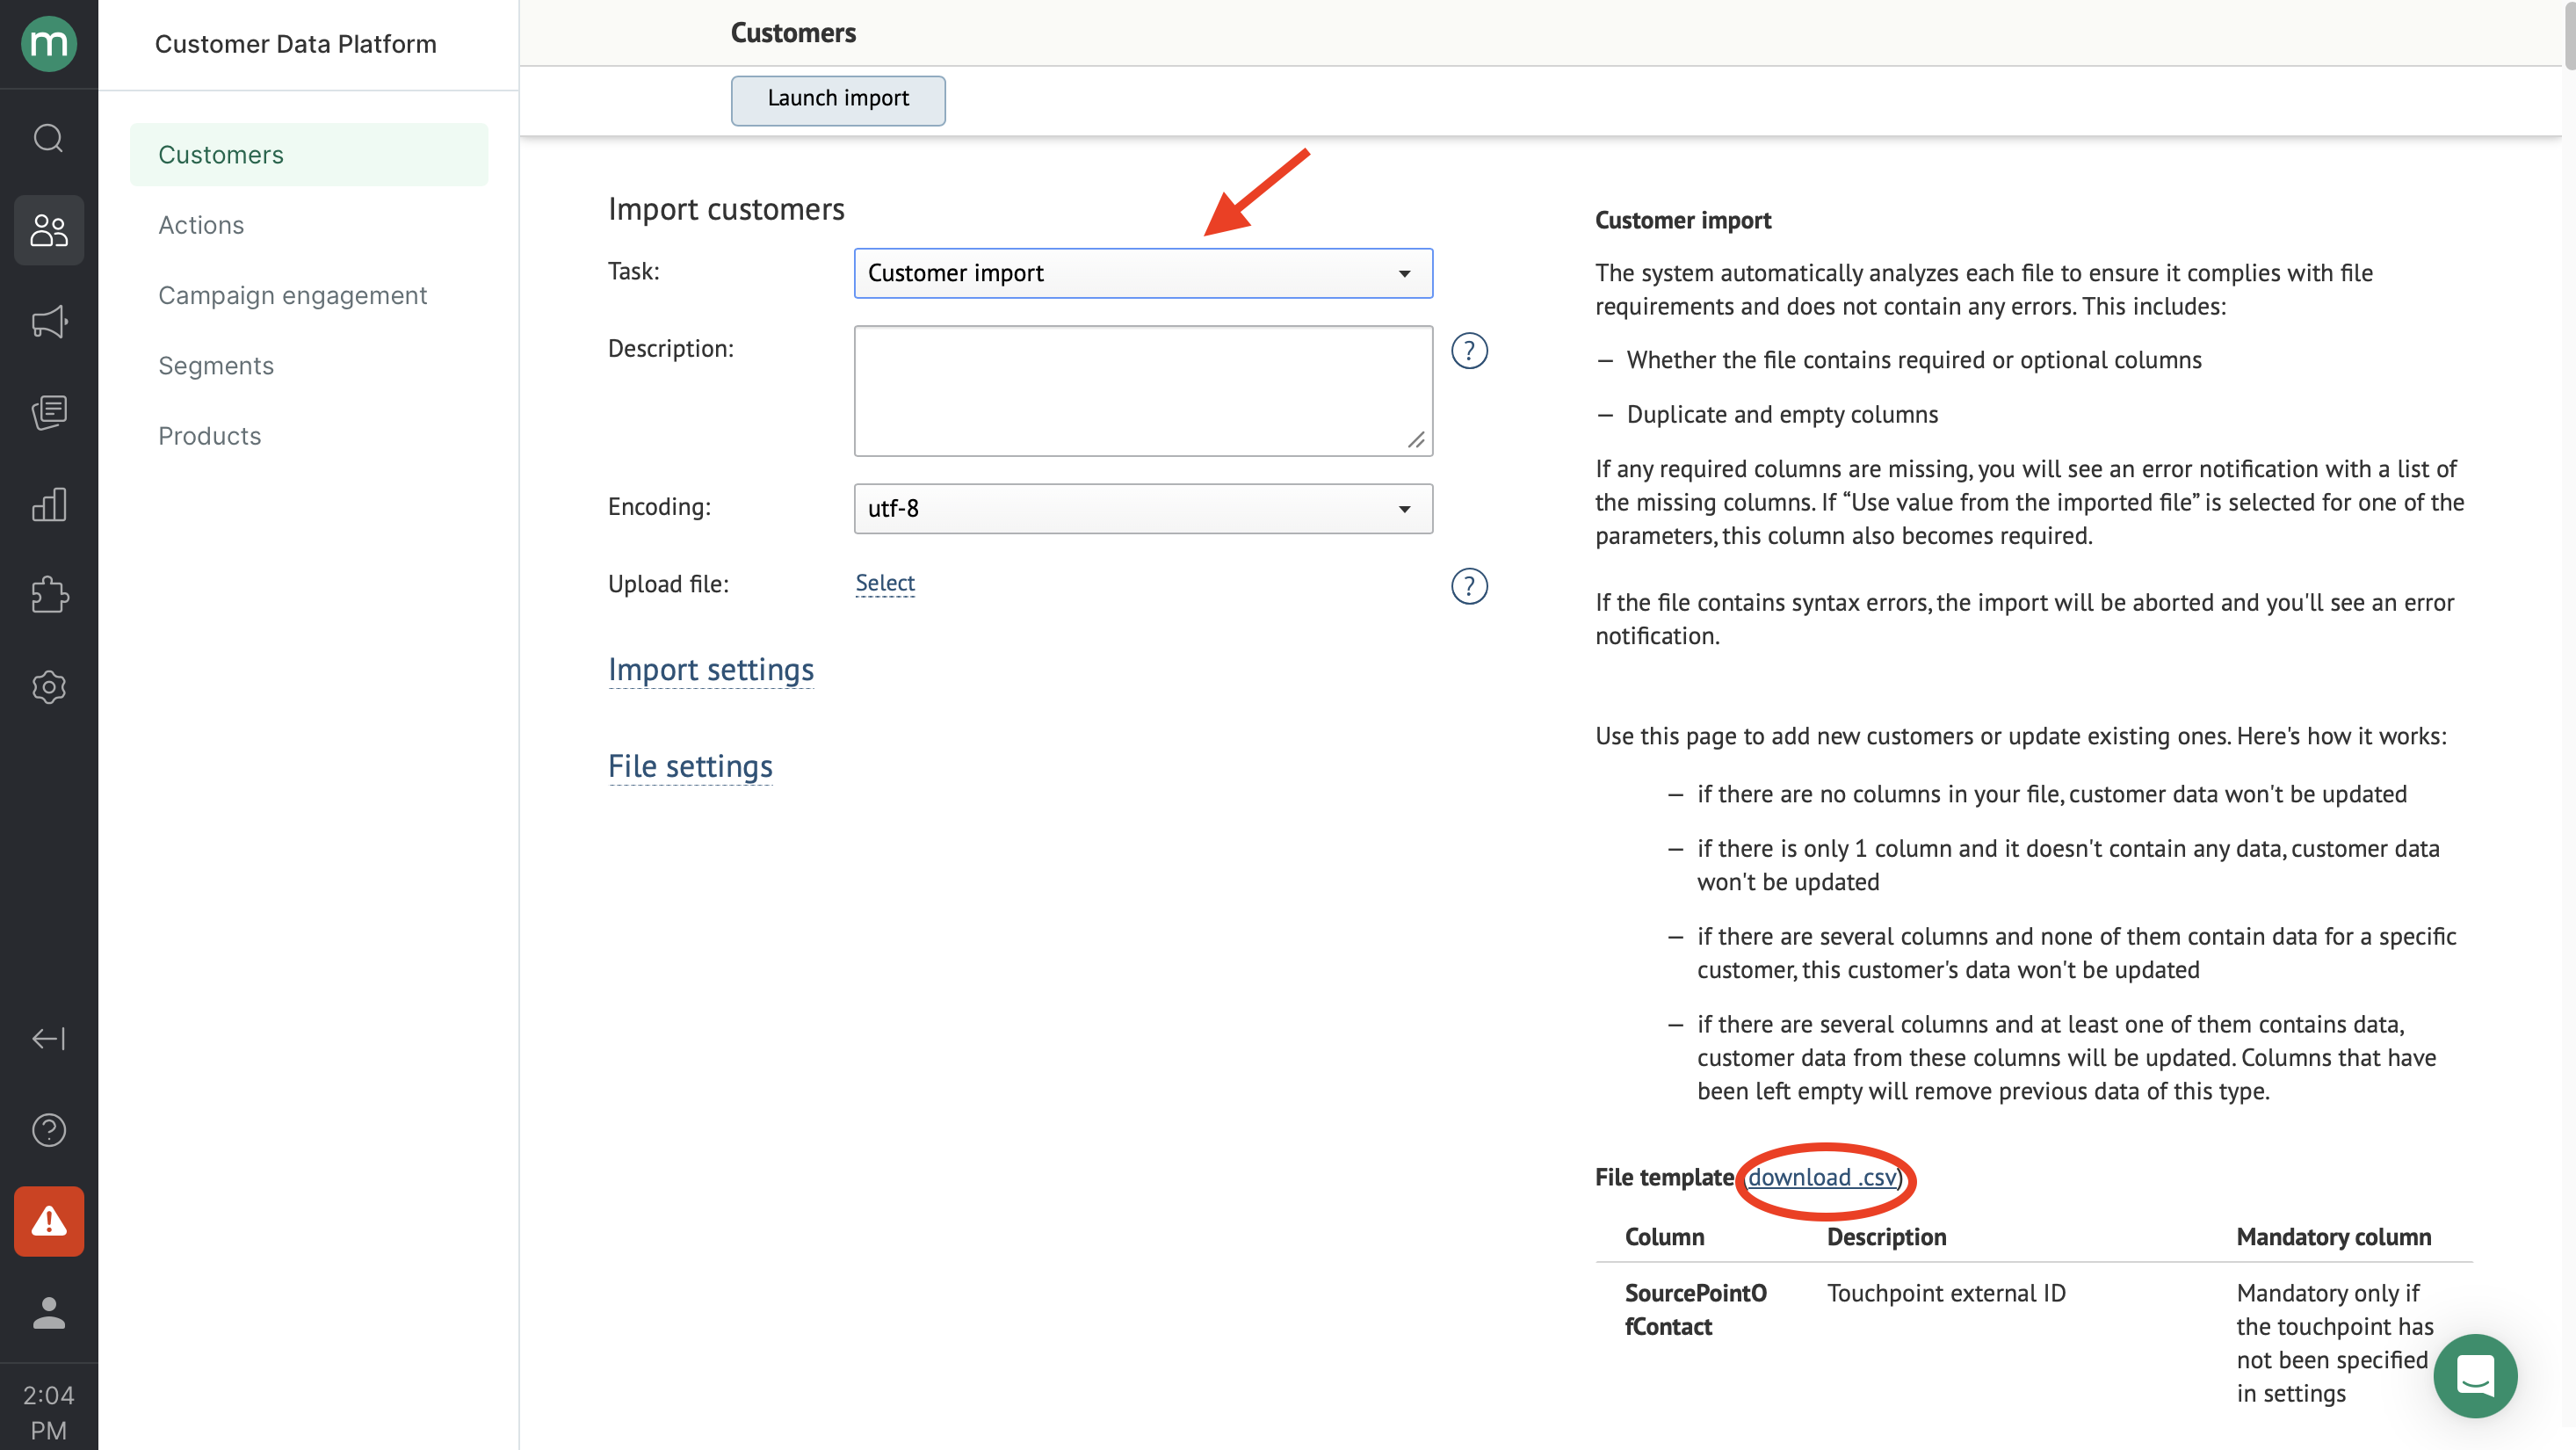
2. Import customers
2.1. Fill in the settings:
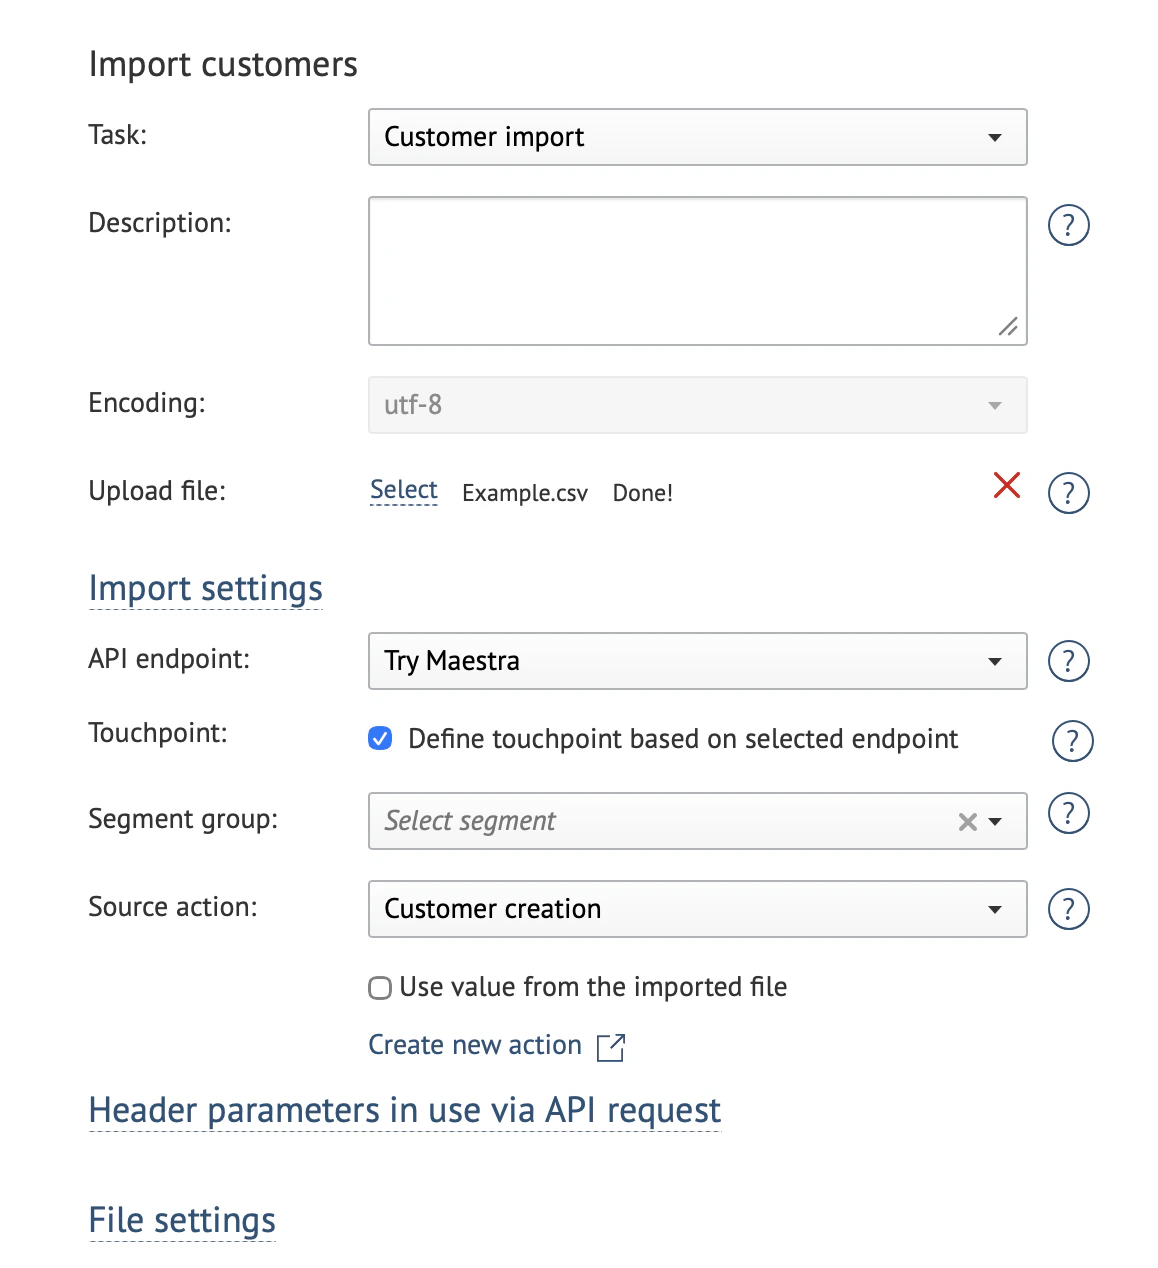
Import settings:
- API endpoint: indicates where the data originated. This affects customer action attribution. The default is “Maestra touchpoint”.
- Touchpoint: determines which channel or integration the customer is linked to. By default, this is detected automatically based on the API endpoint. If you need to explicitly associate customers with a specific website or store, select the touchpoint manually.
- Segment group: you can add customers from the file to a static segment. Select an existing segment or create a new one.
- Source action: the action associated with the customer when they’re added to the database (e.g., “Create customer”). This affects segmentation and analytics.
Source action will be added to customers’ activity feeds. If you create an action template, make sure the action name is easy for you to find – for example “Filled in May “22 survey” or “Registered on xyz.com”.
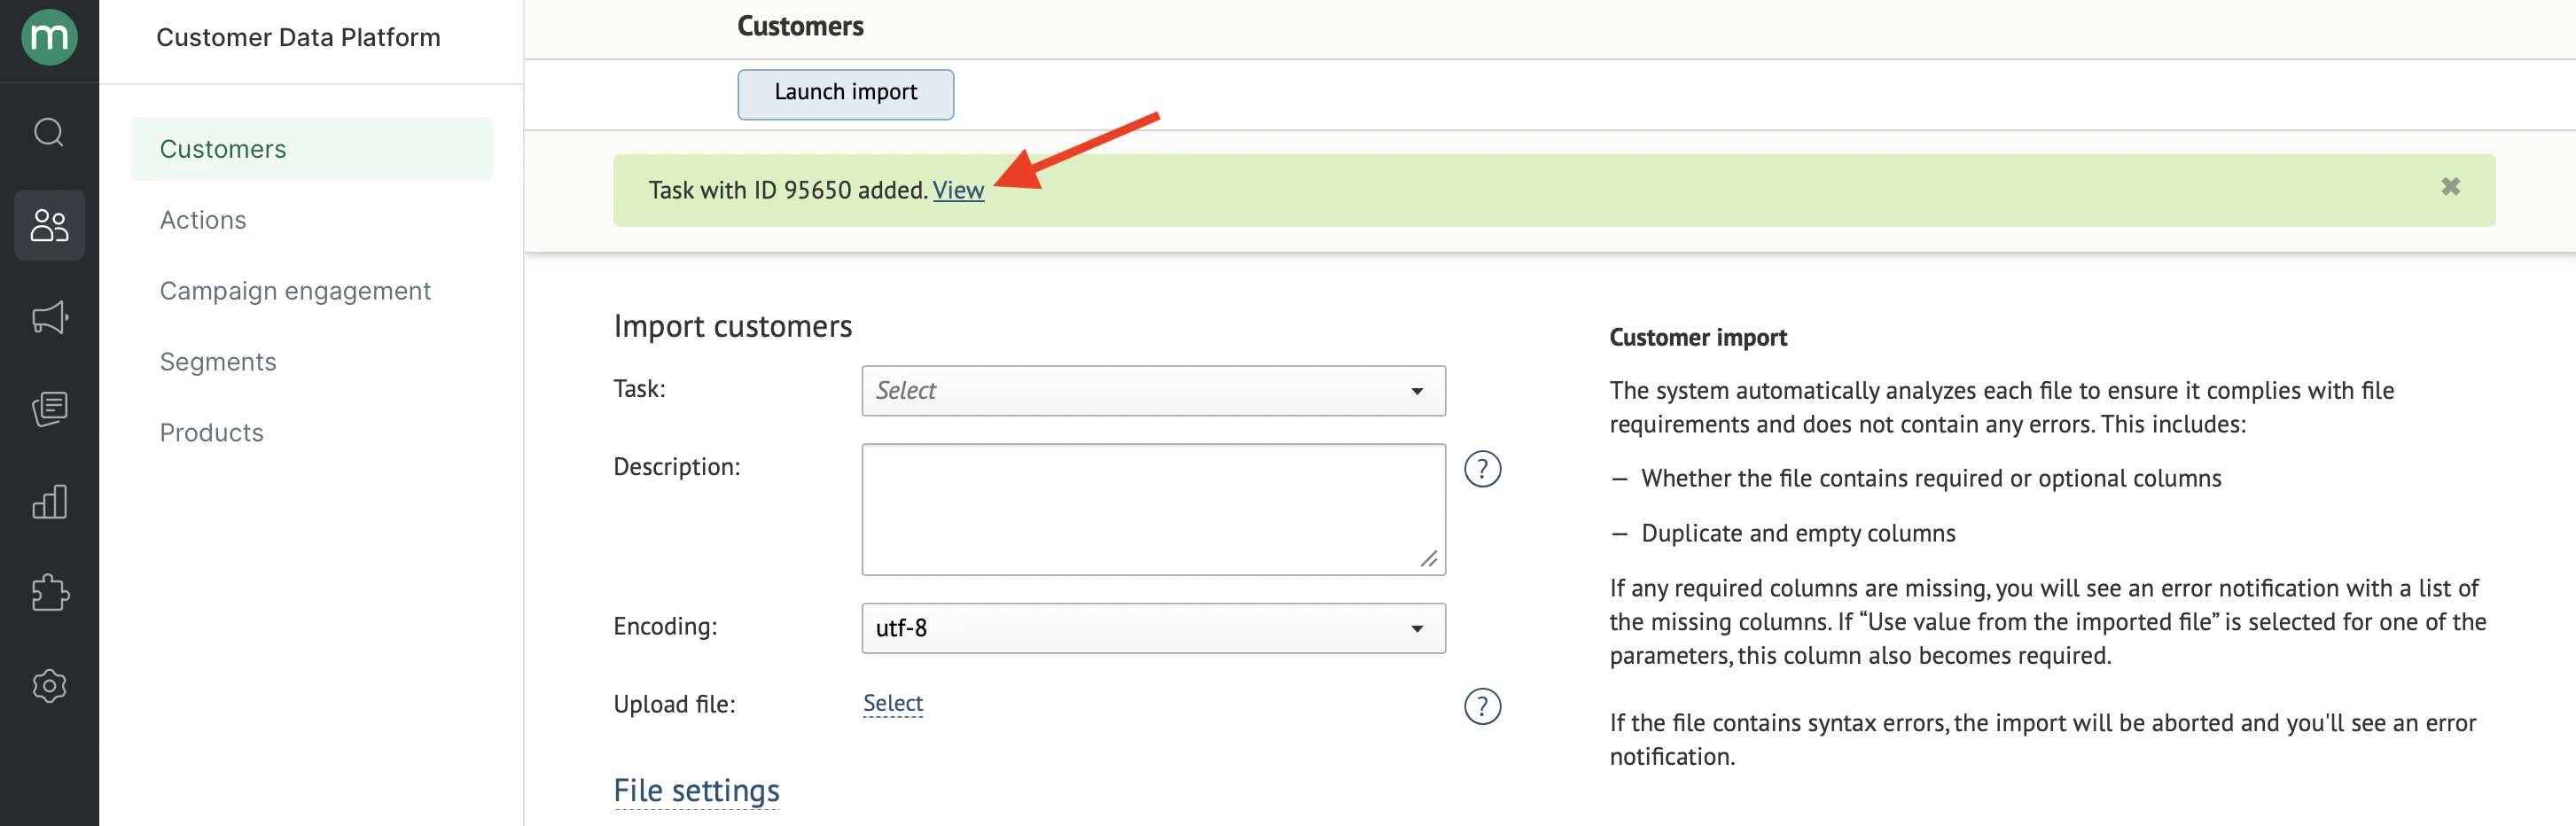
2.2. Click Launch import to add your task:\
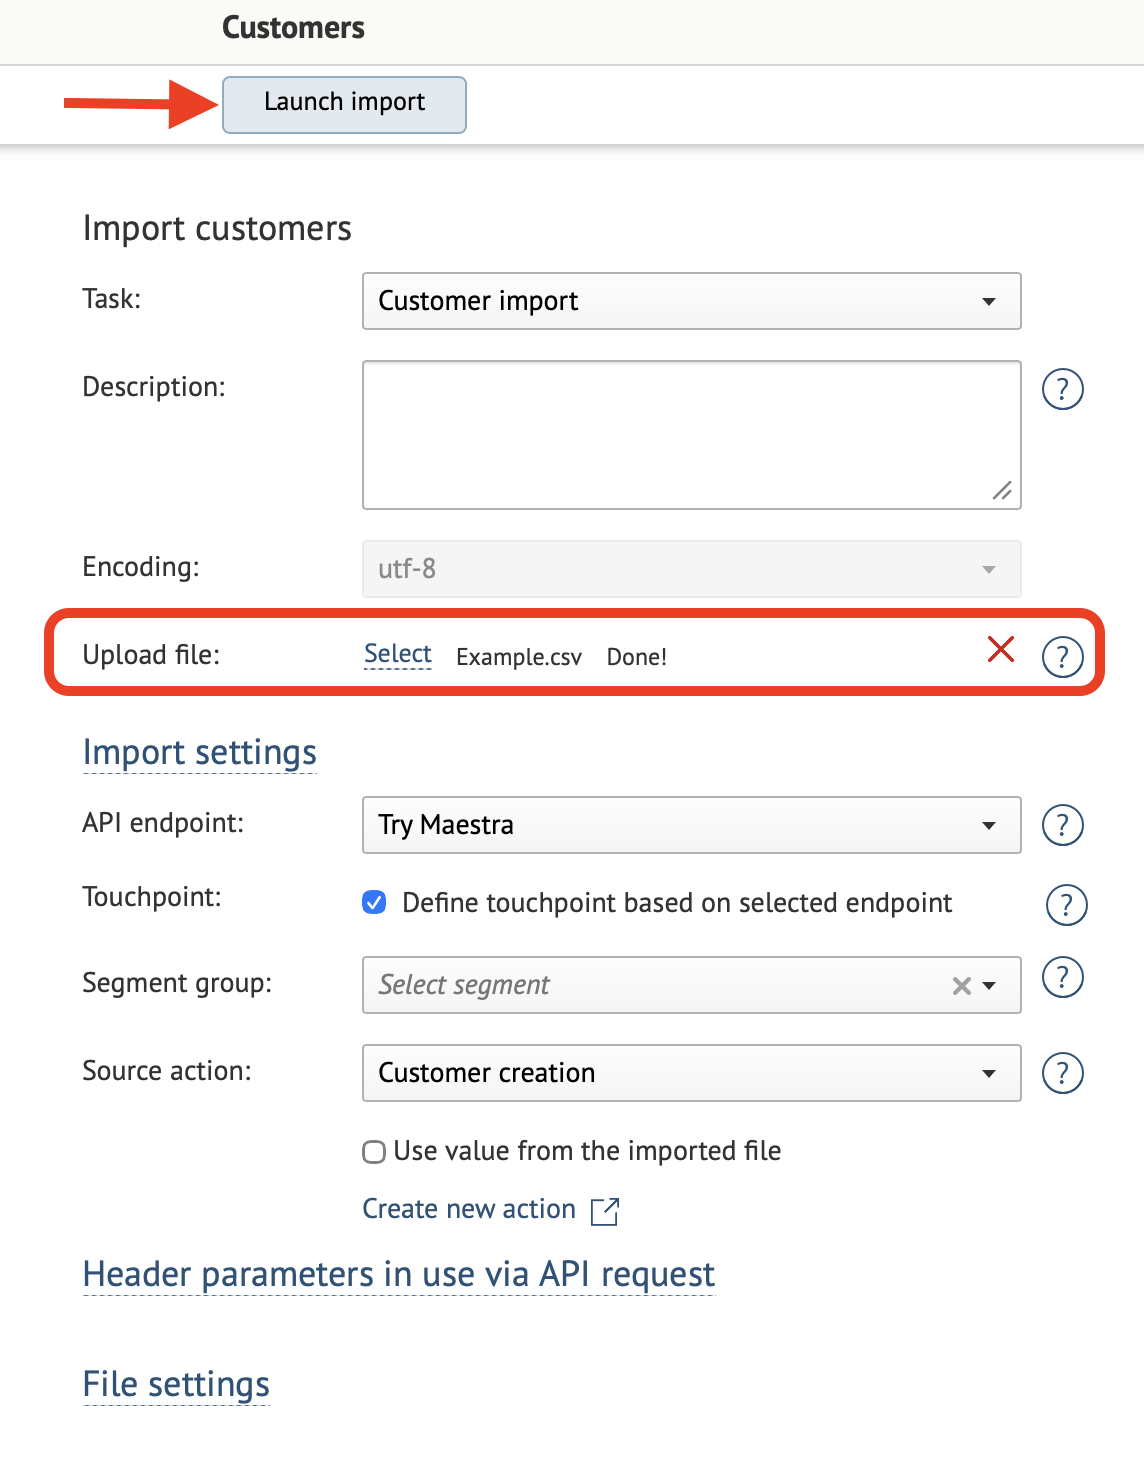
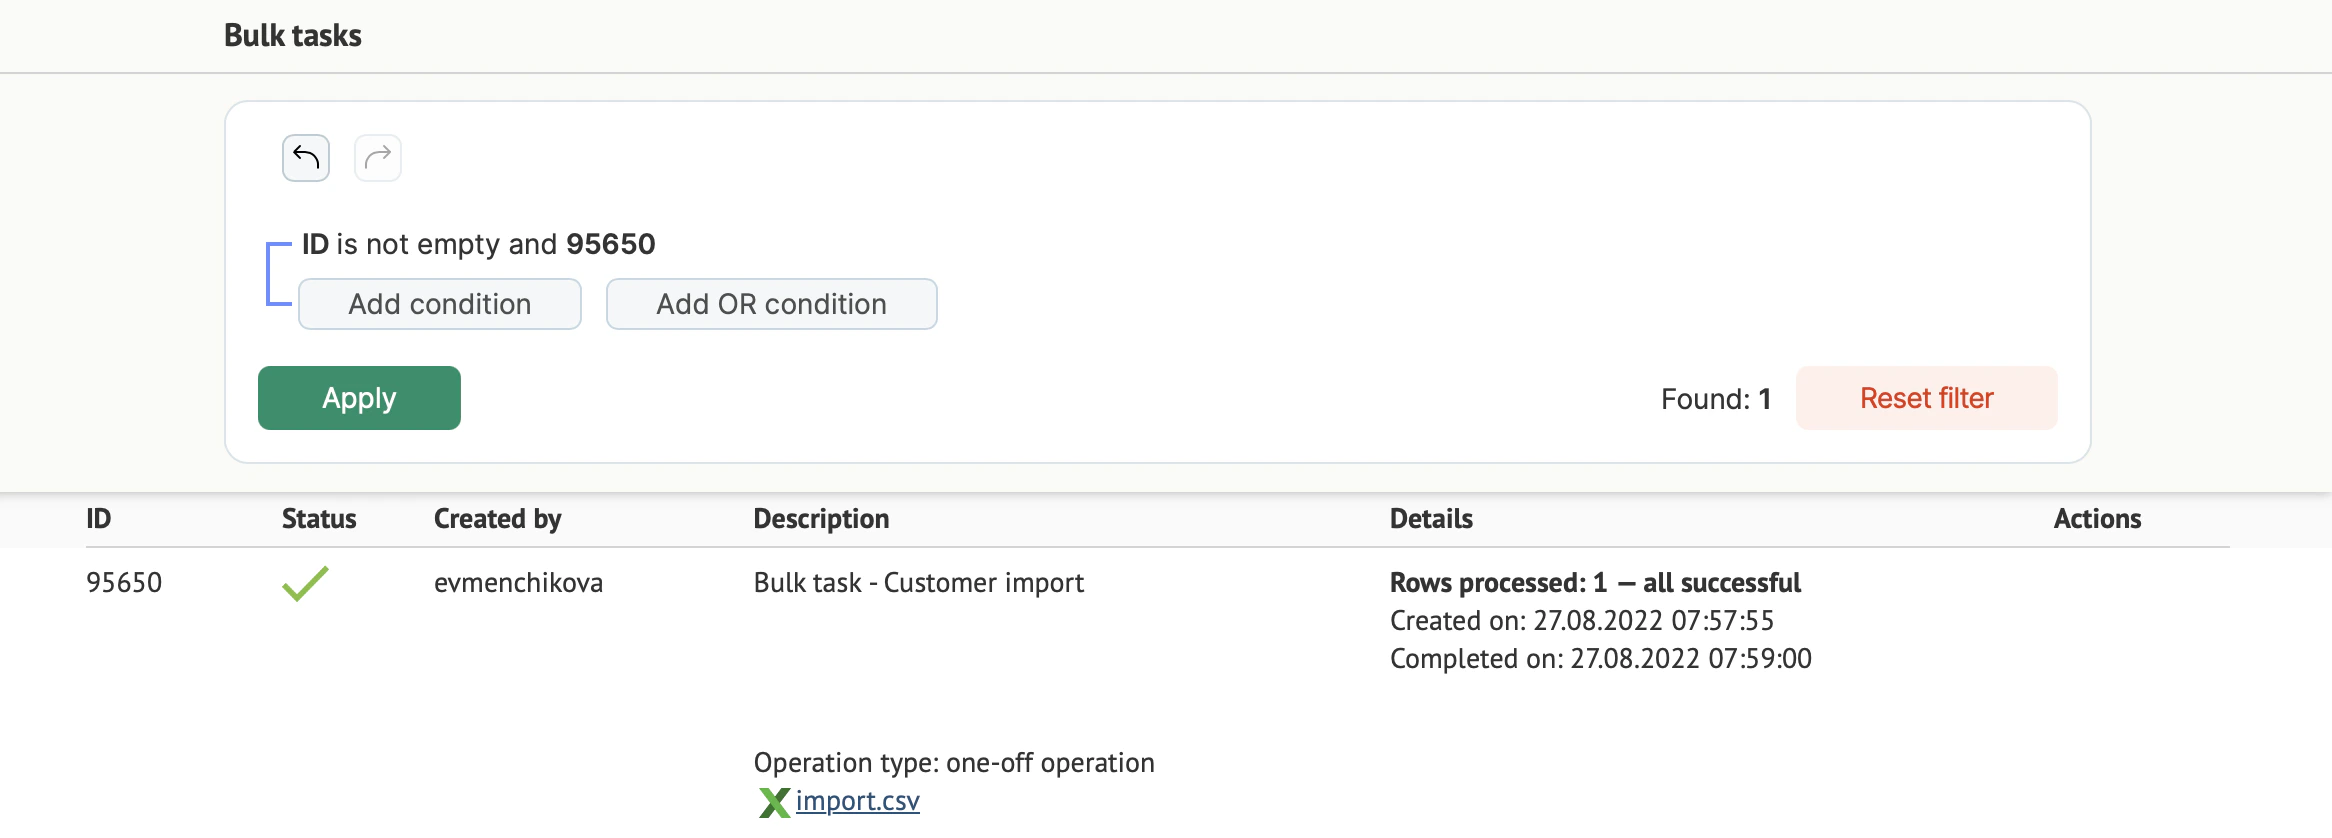
Now you can see a URL leading to this task: